Showing posts with label mine. Show all posts

Thursday, June 23, 2011

Silver MiG

I have two piece of news.

First of all, we have the results of the LegoMilitary Build Competition. And I got second prize in the "Warsaw Pact Aircraft" category! I am very happy, I never managed to achieve anything like that in a competition. Mad Physicist was the judge and it was quite competitive... The other finalists are quite impressive too. The An-225 is quite a beast even at 1:100 scale. The Su-9 from John Lamarck is also very nice, for example it has a retractable landing gear. I am proud to be a member of the club.

The second thing is, that of course I was quite curious whether the bricks I have put together on the screen can be actually built together in real life. Executive summary: they can.


In fact the wing was the only place that needed some redesign because the original was incredibly weak. The contour is the same but now it is a little bit stronger. It is not quite like a rock yet, but I am not afraid to hold it in my hands any more. The body is actually quite rigid, it is easy to hold there.

The plane itself is surprisingly heavy. The body consists of many small plates and its interior is quite packed too so that it holds the airplane together. The landing gear is very weak, it can hardly support the vast weight. This can be seen on the photos too. I am still thinking of another design but so far I did not find anything satisfactory.


Also, the rear is quite heavy so I had to put in some extra weight to keep the balance at the front. Inside the plane there are two metal screws that prevent it from "sitting down".

One more thing, the aft of the cabin roof. This is made of a transparent 2x3 slope brick. The last time such a brick was manufactured was in the seventies. I managed to get one, but it is a bit yellowish.


I am happy to have the real plane after all. I have uploaded many photos to the album and of course to Flickr too. One more extra: for hardcore readers I have uploaded the LXF file to this page so that you can try it on Lego Digital Designer.

Thursday, April 1, 2010

Build your own Mustang!

I wrote about the mini Ford Mustang on the blog several times. The video is on YouTube and it is one of the most popular videos. Many commenters demand that I provide building instructions so that they can have their own.

Since I am not an LDraw pro, I could not do something as beautiful as _lichtblau_ does. You will need Lego Digital Designer (LDD), but you will have a way to build it.

  1. If you did not so far, go to the LDD website and install Lego Digital Designert.
  2. Download one of the Mustang models (or click a picture below) and open it in LDD.


Once this is done, you can use LDD to pimp the car as you like it: new colors, roof, spoilers, anything.


When ready, you can do the following:
  • In "View / Building guide mode" you can create your own building instructions and click it through. If we have all the bricks then this is it, you are ready.
  • In "View / Check Price" you can check how much it costs to order all bricks from the Lego company..
  • In "View / Send model to LEGO.com" you can upload it to Lego.com (and make it viewable by anyone) and also buy it. You can design your own box, instructions, I do not go into details now.

If you compare the LDD model to the original red Mustang you will find some differences:
  • LDD does not have all the bricks in all colors. Because of this neither of the downloadable LDD models are red. If you are brave enough you can try to order the bricks in all your favorite color from Bricklink.
  • The hood of the car on the video is made of this part. Unfortunately LDD does not have this at all. If you would like to have this hood you can order one on Bricklink.
I have put a couple of new images here and these are the old ones from the red Mustang.

Friday, February 12, 2010

The Old Lady flies again

It was almost a year ago when I completed the airplane with the radial engine. Luckily it is still in one piece and now that the Lego Technic Challenge was looking for flying things I got enthusiastic again and fixed a couple of small things that I have always wanted to fix.


First, the closing mechanism of the canopy was not robust enough, it opened very easily. The new version can be closed properly and stays like that. I have also changed the front part of the vertical fin so that it is more firmly attached to the tail.


The gears are now also attached in a more robust way.


Last but not least I have made new photos and a new video too, here it comes:

Wednesday, February 3, 2010

Updated: Almost Lead Sled

The Lead Sled project has made progress but I am not entirely happy with the results so far. The packets ordered on Bricklink have arrived one by one each day. The final order was UK, France, the Netherlands and New Zealand - I have ordered them all with a few minutes difference.


The first obvious problem is that some parts arrived in the wrong color. Unfortunately both of them are at visible places, one is the hinge of the doors and the other is part of the rear seat. One of the merchants was very kind to send the piece in the right color in a follow-up mail.


There are other problems too. The most obvious one is that the very front of the car gets detached from the rest very very easily as it is held in place by two studs only. I did not realize this when I designed it in LDD - it will need a redesign and it is far from trivial. The rest of the front is not very strong either but I have managed to get it up to an almost acceptable level by adding more stiffeners.


One more issue is that when opening the hood there is an obvious tension between the hood and the chassis. As I could judge from the photos this is exactly the same on the original model built by Mad Physicist, so I am not sure if that one is any better.


The studs at the upside down pieces near the front wheels make contact with the wheels. This can be only realized once I start pushing the model. I have also not figured out how to attach the chrome parts to the wheel either.

All in all it does not feel as a total success yet, but on the photos it looks good.

Updated: seeing my enthusiasm Mad Physicist has provided me more details about the internal structure of his car here and here. Looking at the photos I quickly started to wonder why I was not able to figure it out by myself :) Anyway the tips should be enough to make the front a bit more rigid, have a proper cover on the wheels and avoid the contact between the front wheels and the body.

Friday, January 8, 2010

Always behind

There is so much happening that I never manage to catch up. First of all, 2010 is now here, Happy New Year to all our readers! I could summarize what happened in 2009 but I am a bit lazy, do not want to make anything appear bigger than it is and it is anyway too late for it. Perhaps in 2011.

Meanwhile some hints about what to expect in 2010 and the near future:
  • The Lead Sled project has made some progress too, I have ordered the bricks on Bricklink today. I have spent an awful lot of time with loading the list into Bricklink, checking that I have everything and ordering it from shops actually having it. In short: 700 parts from 130 kinds from New Zealand, the UK, the Netherlands and France, for about 80 bucks.

Until I manage to get along with all this I would like to recommend some reading. The first offer is Sariel's summary of his year 2009 creations with baggers, tanks and other vehicles, the pictures speak for themselves. Those interested in even more details should definitely read Sariels' scaling tutorial as well.


Finally for the fans of mini models this Unimog is a real gem. Like a real Unimog it has a lot of ground clearance and on the photo with the internals you can grab all the tricks used to make it happen.

Stay tuned for more.

Sunday, September 20, 2009

Ship in the fish tank

During the summer our kids convinced us to get a fish tank for them. My biggest daughter takes good care of it most of the time and if she forgets then there is Mom who is known to take care of everything.


So far the fish tank had the usual content: fish, plants, decoration, filter etc. But having a father like this it did not take long to get some bricks in there.


What had to happen has happened: there are Lego bricks in the water now. After short thinking I have decided to build a ship that somehow happened to sink right there.


Putting it down was not very simple. As it turned out, Lego bricks are just a little bit heavier than water so it is solvable without additional weight. To get it right, I had to get rid of all the bubbles stuck inside the bricks. I chose the simplest way. With my daughter we disassembled it above the water completely and then built it again underwater with fish watching the show.


As of know it is not known if the fish like it or not. But they are alive and well.

Thursday, July 9, 2009

Overwhelmed

These days I am overwhelmed with Lego sets. I have already covered the ones I got for my birthday and the 8865 Test Car is not forgotten about either. (However it is many kilometers away from me right now, it takes some time before I can take it in my hands - I promise it will come soon.)

But this is not the end of the story yet. Meanwhile I have managed to get a 8448 Sports Car too. I have already mentioned my ambitions to get all the pieces of the Big Car series and this is a new item in the row. This is where I stand now: 853 (1977), 8860 (1980), 8865 (1988)?, 8880 (1994), 8448 (1999).


I have started to put it together but documenting everything appropriately takes some time - I promise I will get there in days.

But even this is not the end of the whole story. Somehow I got a 8422 motorbike too, waiting to be re-assembled. I think was the biggest surprise of all my deals so far. I have bought second-hand sets with full warranty, missing bricks shipped after me. I have bought sets assembled and disassembled but I did not expect what has happened with this bike. It came in assembled in a bag. When I opened the bag I already got suspicious because some parts that should have been white according to my memories looked pretty yellowish. And besides that... it stinked! The previous owner must have been a chain smoker and the smell was so strong that I had to put it to the balcony to make sure the family sleeps well. I always learn something new :)

I hope I can make it enjoyable soon so that I can cover it.

Monday, July 6, 2009

Birthday surprise

I happened to have a birthday recently. I planned enough carefully and selected something that has nothing to do with Lego. Well, I have failed :) This is what happens if a caring mother prepares the children and makes sure they have something to give to their father :)

So I got an 8270 Crane:

Ab 8259 Mini Bulldozer:

And an 8165 Monster Jumper:

They are all very nice :) And how do they look like in motion? Click on the video:


More images in the album.

Friday, June 12, 2009

Messerschmitt Bf-109

Most of the time I am a pacifist except when it is about warbirds. I have built this airplane about a year ago but it was not covered on the blog yet.

The goal was to build a Messerschmitt Bf-109G "Gustav" fighter plane from WWII. The original plane is probably the most well known German fighter plane from the era that flew in many air forces in the world including the "Puma" Air Defense Wing.

It was designed in LDD, so the most of it can be ordered on factory.lego.com-on. Some advice before you do so:
  • Ordering on the site is limited to western countries. The price is approximately 80 USD.
  • It may happen that some parts have run out of stock. Best is to download the LDD file, swap the critical parts to something else and it is ready to be ordered.
The way the plane was designed and built means the use of colors is ... cough ... interesting :) Most of it is black because most Lego parts are available in black. The undernose is yellow becuase a similar scheme was used on German elite squadrons. The tail has a Hungarian flag though.

After I got it from Lego I replaced the propeller with a 3-feather one using Technic parts and it got an undercarriage.


To check out the details please visit the album.

Wednesday, May 20, 2009

Mustang from bricks

Yesterday I have finally got all the missing packets containing Mustang parts. Of course I started building the Great Masterpiece immediately. This is the result:


I am quite happy with it. Of course I got new ideas while building it, for example I have realized that I could have made the interior of the door from tan colored panels. Maybe next time...

Until then some statistics:
  • total time spent: approx. 6 hours
  • total money spent: apporx. 40 USD
  • waiting for the bricks: 10 days
  • number of bricks: about 200 including the roof (not yet visible)
More images in the album. And a video:

Thursday, May 14, 2009

Virtual Mustang

While I am waiting to get all Mustang parts I thought I would make a virtual version. Unexpectedly, getting all the virtual parts was not easy either - the mudguard was neither in the official nor in the unofficial parts of LDraw. I was lucky enough to get some help from gzurti so I have everything now. The result illustrates the difference between images made by LDraw (or POV-Ray to be precise) and LDD (click for more):


Meanwhile I got the first package for the real Mustang - I hope I will get the rest soon as well.

Friday, May 8, 2009

Mustang project

Although I am a Technic fan, these days I run into many realistic models. I like cars and aircraft most especially if they are not too large like the mini-Technic models from the Arvos or the cars from the Ralph.

I got so enthusiastic that I started thinking about how I could build something like that. First I considered replicating the excellent Porsche from the Arvo brothers. I did not drop the idea completely but so far it seems to exceed my capabilities. It would take a lot of time to find out how the invisible parts are done and it would take many special bricks like the windscreen ($26 used) or the a rear windows ($15 new), making it expensive.

Building small models leads to different challenges than large ones where the scale gives you much more freedom. With small ones one has to brainstorm about putting each brick to its place, considering different alternatives in many cases. It needs special pieces in unusual colors to return the characteristic features of the original. I have no clue about how pros do it but it seems impossible that they have all the bricks on their shelves in advance in the desired colors (it is worth to take a look at the color chart).

Finally, I have made up my mind. I have decided to try a Ford Mustang convertible (the current one, not the old one). Decisions so far:
  • I have many bricks (ask my wife) but not enough. The car will be built solely from newly bought bricks not to limit building. I am also curious how much it will cost. Also, I would like to keep it in one piece forever.
  • This makes designing a bit difficult. I have built prototypes for certain parts from the bricks I have but the final car is modeled in LDD because I do not know LDraw very well. LDD also makes some sanity checks like checking if all the bricks are connected.
  • The car will be 6 studs wide. This is small but it allows me to use some special parts like the mudguards.
This is where planning is at the moment. There will be some parts that will look different and I will use other colors too. But the basic shape can be seen.


It seems like $40 will cover the financial side. Ordering was a bit complicated because there are some part I could find only at one merchant, so I had to order from 4 different shops to cover everything.

So far so good. When it is ready it will go to brickshelf and of course I will tell you about it on the blog too!

Saturday, February 21, 2009

Airplane with radial engine

As promised I built an airplane around the radial engine. I did not want to make it too complicated so the result is a 2-seat training plane. The yoke works as expected operating the elevators and the ailerons but there is two of them linked together. The gears are damped with springs and the canopy can be opened supported by a spring when it is open. It would have been more elegant to use a damped spring but that would have taken too much space, and the aircraft almost falls down from the self already...


More photos in the album. There is a video too:

Radial engine

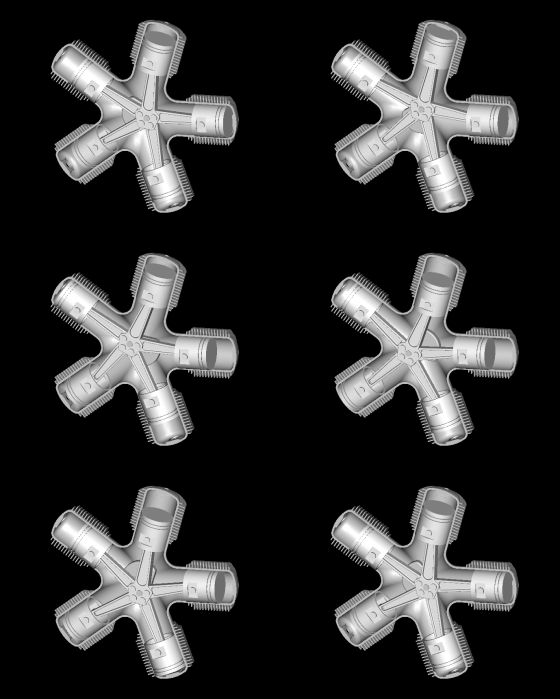
I have to admit that besides cars I also have a passion for airplanes. It is no wonder I have started thinking about doing a radial engine (Wikipedia article). This configuration is used mostly on aircraft and it looks like this:


After some skunk work I have decided to implement one based on betula's design. The first prototype is ready and looks like this:


There are some differences though (besides the colors of course). For example in Betula's design none of the rods are fixed to the hub of the engine. To me this lead to some problems in practice. When changing the direction of the rotation it sometimes got stuck. In my design there is a master cylinder attached to the hub. It rotates very smoothly and does not have a tendency to get stuck. The other change is that instead of using a gear in building the crankshaft I use the normal half-pin shift part even though it means the engine got a bit longer.

And how does it look like while working? Like this:


Now if only I had time to build an airplane... (More images in the album.)